Centos搭建GitLab+Jenkins+SonarQube实现CI/CD
注:该教程可以将服务部署成功,但是在测试项目时,编写jenkinsfile总是会因为插件找不到而出错,暂未解决这个问题
jenkins的jenkinsfile只使用了打印简单语句作为测试。
添加git仓库,并提交代码,能够实现触发jenkins流程,而且能够运行成功
因为SonarQube插件已经安装,但是jenkinsfile总显示找不到,未能连调成功
1. 前提条件
1.1 硬件与系统要求
- 阿里云 ECS 实例:
- 规格:至少 4 核 CPU、8 GB 内存、50 GB SSD 磁盘(推荐 16 GB 内存以确保性能)。
- 操作系统:CentOS 8(最新版本,截至 2025 年 6 月仍支持)。
- 网络:
- 公网 IP(绑定到 ECS 实例)。
- 安全组规则:开放以下端口:
- 22(SSH)
- 80(HTTP,GitLab)
- 443(HTTPS,GitLab)
- 8080(Jenkins)
- 9000(SonarQube)
- 账户与权限:
- 阿里云账户(已购买 ECS 实例)。
- 具有
root权限的用户。
- 工具:
- 本地电脑安装 SSH 客户端(如 PuTTY 或终端)。
- 浏览器(推荐 Chrome)。
2. 环境准备
2.1 创建并配置 ECS 实例
- 登录阿里云控制台(https://ecs.console.aliyun.com)。
- 点击“创建实例”,选择:
- 地域:选择靠近你的区域(如华东 1)。
- 实例类型:ecs.c6.large(4 vCPU,8 GiB 内存)。
- 镜像:CentOS 8(公共镜像)。
- 存储:50 GB SSD 云盘。
- 网络:分配公网 IP,带宽按需(建议 5 Mbps)。
- 配置安全组:
- 创建新安全组,添加规则:
1
2
3
4
5
6
协议类型 | 端口范围 | 授权对象 TCP | 22 | 0.0.0.0/0 TCP | 80 | 0.0.0.0/0 TCP | 443 | 0.0.0.0/0 TCP | 8080 | 0.0.0.0/0 TCP | 9000 | 0.0.0.0/0
- 创建新安全组,添加规则:
- 设置实例密码或上传 SSH 密钥对,记录密码/密钥。
- 确认配置,点击“创建实例”,等待实例启动(约 2-5 分钟)。
2.2 连接 ECS 实例
- 获取实例公网 IP(如
47.100.123.456)。 - 使用 SSH 客户端连接:
1ssh root@47.100.123.456 - 输入密码或使用密钥登录,成功后进入 CentOS 终端。
2.3 更新系统并安装基础工具
- 更新系统包:
1
2
yum update -y yum upgrade -y - 安装常用工具:
1yum install -y curl wget vim git
2.4 安装 Java
安装 OpenJDK 17
|
|
3. 安装 GitLab
3.1 安装依赖
- 安装必要依赖包:
1 2 3yum install -y policycoreutils-python-utils openssh-server postfix systemctl enable sshd postfix systemctl start sshd postfix
3.2 添加 GitLab 仓库并安装
-
添加 GitLab 官方仓库:
1curl -sS https://packages.gitlab.com/install/repositories/gitlab/gitlab-ce/script.rpm.sh | sudo bash -
安装 GitLab 社区版(CE): 安装 GitLab CE 并配置。
1sudo yum install -y gitlab-ce配置 GitLab
编辑 GitLab 配置文件,设置外部 URL(替换
your_domain.com为你的域名或服务器 IP)。1sudo vim /etc/gitlab/gitlab.rb修改以下行:
1EXTERNAL_URL="http://your_domain.com"重新配置并启动 GitLab:
1 2sudo gitlab-ctl reconfigure sudo gitlab-ctl start
3.3 访问 GitLab
- 打开浏览器,访问
http://your_domain.com。 - 首次访问会提示设置 root 用户密码,记录密码。
- 登录后,创建新项目(例如
test-project)用于测试。 - root的默认密码是在
/etc/gitlab/initial_root_password文件中
3.4 创建测试项目
- 登录 GitLab,点击“Create a project” > “Create blank project”。
- 设置项目名称(如
test-project),可见性为“Private”,点击“Create project”。 - 记录项目 HTTP URL(如
http://your_domain/root/test-project.git)。 - 生成 SSH 密钥(在本地电脑):
1 2ssh-keygen -t rsa -b 4096 -C "your_email@example.com" cat ~/.ssh/id_rsa.pub- 复制公钥。
- 在 GitLab 中添加 SSH 密钥:
- 进入 Profile > Preferences > SSH Keys,粘贴公钥,点击“Add key”。
4. 安装 SonarQube
4.1 安装 PostgreSQL
SonarQube 需使用 PostgreSQL 数据库(社区版不支持 MySQL)。
注:本教程中使用的sonarqube 10版本,需要postgresql起码9.3版本,这里直接使用14的版本进行部署
- 安装 PostgreSQL:
1 2 3 4 5 6 7 8 9 10 11 12 13 14 15 16 17 18 19 20 21 22 23 24 25 26 27 28 29 30# 添加 PostgreSQL 官方 Yum 仓库 sudo yum install -y https://download.postgresql.org/pub/repos/yum/reporpms/EL-7-x86_64/pgdg-redhat-repo-latest.noarch.rpm # 安装 PostgreSQL(推荐版本 14 或更高) sudo yum install -y postgresql14 postgresql14-server postgresql14-libs postgresql14-contrib # 初始化数据库 sudo /usr/pgsql-14/bin/postgresql-14-setup initdb # 启动并启用 PostgreSQL 服务 systemctl enable postgresql-14 systemctl start postgresql-14 # 切换到postgres用户下,为postgres用户修改数据库密码,因为下面会将pg的配置文件修改为md5的模式,如果没有修改密码,则无法登陆 su - postgres psql alter user postgres wiht password 'newpassword'; \q # 将配置文件中method列修改为md5模式,修改完毕后保存并退出 # 例如 # 修改前: local all all peer # 修改后: local all all md5 vim /var/lib/pgsql/14/data/pg_hba.conf # 重新加载配置文件信息 sudo systemctl reload postgresql # 测试新密码,如果连接成功,则代表ok psql -U postgres -h localhost -W - 配置 PostgreSQL:
1 2 3 4 5 6 7su - postgres psql CREATE USER sonar WITH ENCRYPTED PASSWORD 'sonar123'; CREATE DATABASE sonarqube OWNER sonar; GRANT ALL PRIVILEGES ON DATABASE sonarqube TO sonar; \q exit
4.2 安装 SonarQube
-
下载并解压 SonarQube 社区版(截至 2025 年 6 月,最新版本为 10.x):
1 2 3 4 5 6# 将下载下来的SonarQube解压缩到/opt目录下 cd /opt wget https://binaries.sonarsource.com/Distribution/sonarqube/sonarqube-10.0.0.68432.zip yum install -y unzip unzip sonarqube-10.0.0.68432.zip mv sonarqube-10.0.0.68432 sonarqube -
配置 SonarQube:
- 编辑
conf/sonar.properties:1vim /opt/sonarqube/conf/sonar.properties- 添加/修改以下内容:
1 2 3 4 5sonar.jdbc.username=sonar sonar.jdbc.password=sonar123 sonar.jdbc.url=jdbc:postgresql://localhost:5432/sonarqube?useUnicode=true&characterEncoding=utf8 sonar.web.host=0.0.0.0 sonar.web.port=9000
- 添加/修改以下内容:
- 编辑
-
创建 SonarQube 用户并设置权限:
1 2 3groupadd sonar useradd -g sonar -d /opt/sonarqube sonar chown -R sonar:sonar /opt/sonarqube -
配置系统参数:
1 2 3 4 5echo "vm.max_map_count=262144" >> /etc/sysctl.conf echo "fs.file-max=65536" >> /etc/sysctl.conf sysctl -p echo "sonarqube - nofile 65536" >> /etc/security/limits.conf echo "sonarqube - nproc 4096" >> /etc/security/limits.conf -
设置 SonarQube 服务
SonarQube服务不能使用root身份进行启动,需要切换到sonar普通用户进行启动,但是在启动前需要将SonarQube服务所在的目录权限和所属用户,切换给sonar用户
1 2 3 4 5 6 7sudo chown -R sonar:sonar /opt/sonarqube sudo chmod -R 755 /opt/sonarqube su - sonar cd /opt/sonarqube ./bin/linux-x86-64/sonar.sh start # 如果此处启动失败,就去看下sonarqube/logs目录下的日志信息 -
访问 SonarQube:
- 浏览器打开
http://your_domain.com:9000。 - 默认登录:用户名
admin,密码admin。 - 设置新密码(如
admin123)。
- 浏览器打开
-
创建项目:
- 点击“Create Project” > “Manually”。
- 项目名称:
test-project,项目键:test-project,分支:master。 - 生成 Token(如
sonar-token-123),记录以供 Jenkins 使用。
5. 安装 Jenkins
5.1 添加 Jenkins 仓库
安装最新版本的 Jenkins(长期支持版,免费)。
|
|
安装 Jenkins
安装 Jenkins 及其依赖
|
|
启动 Jenkins
启动并设置 Jenkins 开机自启。
|
|
配置 Jenkins
- 访问
http://your_domain.com:8080。 - 获取初始管理员密码:
|
|
- 按照界面提示完成安装,建议安装推荐插件。
- 创建管理员账户。
安装必要插件
在 Jenkins 仪表盘:
-
进入 Manage Jenkins > Manage Plugins。
-
安装以下插件:
- GitLab Plugin:用于 GitLab 集成。
- SonarQube Scanner:用于 SonarQube 扫描。
- Pipeline:支持流水线功能。
- Git:支持 Git 仓库操作。
-
配置全局工具:
-
进入 Manage Jenkins > Global Tool Configuration。
-
JDK:添加 JDK,名称
JDK11,取消“Install automatically”,设置JAVA_HOME=/usr/lib/jvm/java-11-openjdk。 -
Maven:添加 Maven,名称
Maven3,勾选“Install automatically”。 -
SonarQube Scanner:添加 Scanner,名称
SonarScanner,勾选“Install automatically”。
-
-
配置 SonarQube 服务器:
-
进入 Manage Jenkins > Configure System > SonarQube servers。
-
添加:
- 名称:
SonarQube- 服务器 URL:
http://your_domain.com:9000 - 服务器认证 Token:添加凭据,类型“Secret text”,粘贴 SonarQube 的 Token(如
sonar-token-123)。
- 服务器 URL:
- 名称:
-
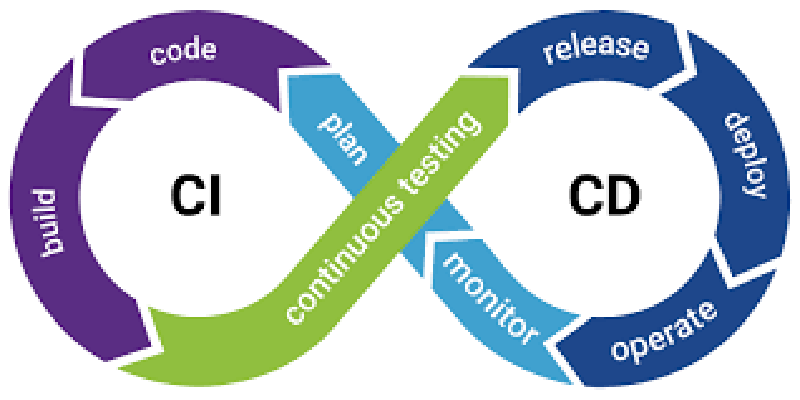
6. 配置 CI/CD 流水线
6.1 准备测试项目
如果没有安装maven可以到官网下载,这里以Linux版本为例,下载安装maven 3.9.10
|
|
- 在本地创建 Maven 项目:
1 2mvn archetype:generate -DgroupId=com.example -DartifactId=test-project -DarchetypeArtifactId=maven-archetype-quickstart -DinteractiveMode=false cd test-project - 配置
pom.xml,添加 SonarQube 插件:1 2 3 4 5 6 7 8 9 10 11 12 13 14 15 16 17 18 19<project> <modelVersion>4.0.0</modelVersion> <groupId>com.example</groupId> <artifactId>test-project</artifactId> <version>1.0-SNAPSHOT</version> <properties> <maven.compiler.source>11</maven.compiler.source> <maven.compiler.target>11</maven.compiler.target> </properties> <build> <plugins> <plugin> <groupId>org.sonarsource.scanner.maven</groupId> <artifactId>sonar-maven-plugin</artifactId> <version>3.9.1.2184</version> </plugin> </plugins> </build> </project> - 推送代码到 GitLab:
1 2 3 4 5git init git add . git commit -m "Initial commit" git remote add origin http://47.100.123.456/root/test-project.git git push -u origin master
6.2 配置 GitLab Webhook
-
在 GitLab 项目中:
- 进入 Settings > Integrations。
- 添加 Webhook:
- URL:
http://your_domain:8080/project/test-job - 触发事件:勾选“Push events”。
- 点击“Add webhook”。
- URL:
1 2 3# 备注:如果上面的url显示无效或者是使用错误,可以使用下面格式的 # 前面是jenkins的管理员账户和token,后面是jenkins的项目地址 http://admin:119cd07f8d572e0bcb832608efb20fce6e@8.138.235.28:8081/project/test-job -
测试 Webhook:
- 点击“Test” > “Push events”,确保返回 200 OK。
6.3 创建 Jenkins Pipeline
- 在 Jenkins 中:
- 点击“New Item”,名称
test-job,选择“Pipeline”。
- 点击“New Item”,名称
- 配置 Pipeline:
-
General:勾选“GitLab Connection”,选择默认连接。
-
Build Triggers:勾选“Build when a change is pushed to GitLab”。
-
Pipeline:选择“Pipeline script”,输入:
1 2 3 4 5 6 7 8 9 10 11 12 13 14 15 16 17 18 19 20 21 22 23 24 25 26 27 28 29 30 31 32 33 34 35 36 37 38 39 40 41 42 43 44 45 46 47 48 49 50 51 52 53 54 55 56 57 58 59 60 61 62 63 64 65 66pipeline { agent any tools { maven 'Maven3' jdk 'JDK17' sonarQubeScanner 'SonarScanner' } environment { GIT_CREDENTIALS = 'gitlab-credentials' SONAR_SERVER = 'SonarQube' DEPLOY_SERVER = 'deploy-server' } stages { // 阶段1:从Gitlab 拉取代码 stage('Checkout') { steps { git branch: "${params.gitlabBranch ?: 'master'}", credentialsId: 'gitlab-credentials', url: 'http://ip/username/xxx.git' // 替换 } } // 阶段2: 编译代码 stage('Build') { steps { sh 'mvn clean package' } } // 阶段3:SonarQube 代码质量分析 stage('SonarQube Scan') { steps { withSonarQubeEnv('SonarQube') { sh 'mvn sonar:sonar \ -Dsonar.projectKey=test-project \ -Dsonar.host.url=http://IP:9000 \ -Dsonar.login=$SONAR_TOKEN' } } } // 阶段4:检查 SonarQube Quality Gate stage('Quality Gate') { steps { timeout(time: 2, unit: 'MINUTES') { waitForQualityGate abortPipeline: true } } } // 阶段5: 部署 stage('Deploy') { steps { sh 'echo "Deploying Successful, but this is a test demo"' // 示例:scp target/*.jar user@server:/path } } } post { always { cleanWs() } success { echo 'Build and deployment completed successfully!' } failure { echo 'Build or deployment failed. Check logs for details.' } } } -
替换
SONAR_TOKEN为 SonarQube Token 的 Jenkins 凭据 ID。
-
- 保存并点击“Build Now”测试。
6.4 配置 SonarQube 报告回写
- 在 SonarQube 中安装 GitLab 插件:
- 进入 Administration > Marketplace,搜索“GitLab”,安装并重启。
- 配置 GitLab 集成:
- 进入 Administration > Configuration > General Settings > GitLab。
- 设置 GitLab URL(
http://your_domain.com/api/v4)和 Personal Access Token(在 GitLab 的 Profile > Access Tokens 生成)。
- 在项目中启用报告回写:
- 进入项目设置,启用“Comment on Merge Requests”。
7. 测试流水线
- 修改本地
test-project的代码(如src/main/java/com/example/App.java),提交并推送:1 2 3git add . git commit -m "Update code" git push origin master - 验证:
- 在 Jenkins 中,检查
test-job是否自动触发构建。 - 在 SonarQube 中,访问
http://47.100.123.456:9000/dashboard?id=test-project,确认代码扫描结果。 - 在 GitLab 中,检查提交是否收到 SonarQube 的质量报告评论。
- 在 Jenkins 中,检查
- 若部署阶段配置了服务器,检查目标服务器上的应用是否更新。
8. 常见问题与调试
8.1 GitLab 无法访问
-
现象:浏览器显示“502 Bad Gateway”。
-
解决:
1 2gitlab-ctl reconfigure gitlab-ctl restart -
检查端口占用:
1netstat -tulnp | grep 80
8.2 SonarQube 启动失败
-
现象:日志(
/opt/sonarqube/logs/sonar.log)显示数据库连接错误。 -
解决:
- 确认 PostgreSQL 运行:
1systemctl status postgresql - 验证
sonar.properties中的数据库配置。
- 确认 PostgreSQL 运行:
8.3 Jenkins Webhook 不触发
-
现象:GitLab 推送无反应。
-
解决:
- 确认 Jenkins URL 可从 GitLab 访问:
1curl http://47.100.123.456:8080 - 检查 GitLab Webhook 日志,确认 HTTP 状态码。
- 确认 Jenkins URL 可从 GitLab 访问:
8.4 LFS 文件未显示
- 若涉及大文件(如你的 125 MB 文件):
1 2 3 4 5git lfs install git lfs track "*.pdf" git add .gitattributes git commit -m "Add LFS tracking" git push origin master